
I decided to risk it with the Lanc – to attach the vertical stabilisers and rudders at the end of the painting process. This might sound dodgy but the precision with which the joins were moulded encouraged it. And it meant that the masking and painting of the flying surfaces was going to be a lot easier.
Such proved the case, with the blessing of those open engine nacelles I mentioned last time – they were perfect suspension points for the whole ship during the entire paint job. It pays to make adjustable jigs that can be used and re-used.
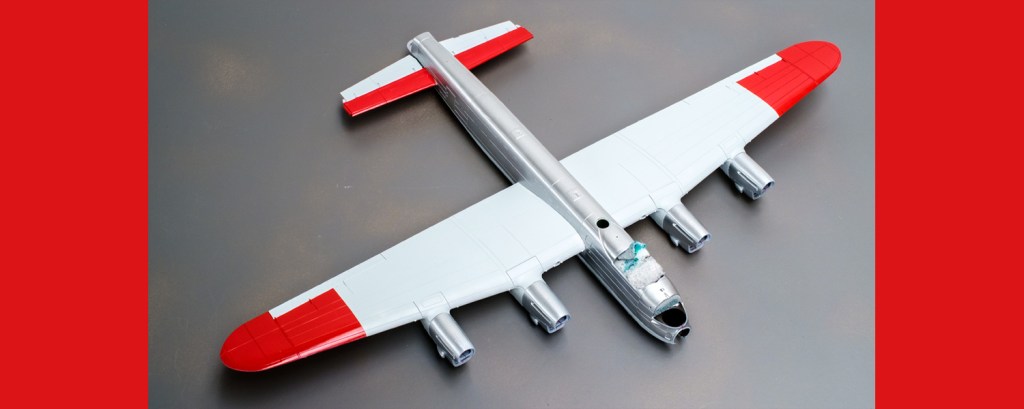
The size of a large model is something that I still need to get my head around when it comes to airbrush painting. This Lancaster was just on the upper limit for airbrush vs rattle can spraying along the bigger flying surfaces. There were a couple of times when I thought the finish would not settle down in spite of careful thinning and selection of air pressure. I used the new single action Procom Boy brush for the larger areas and it does well but it is still a harrowing spray. I think in future I will return to rattle cans for four-engine jobs in as many cases as I can. It’s a little regressive but the results are what count.
In the end it got there. The gloss and eventually the semi-gloss clear overcoat hid most of the worrisome patches in the grey wings and the silver was never a problem. I have yet to try the more exotic metallic coats on an aircraft but there are three different bottles of potential trouble sitting in my paint racks now and eventually I shall have to risk them. Not on a prize model like this, however – at least not at first.
The red wingtips and tail surfaces are never a problem with Mr. Color. As long as you realise that the Hi-Vis idea went through different shades of red, orange, and Day-Glo, and spray according to the era you’re depicting, you’ll get an eye-catching trim.

Leave a comment