
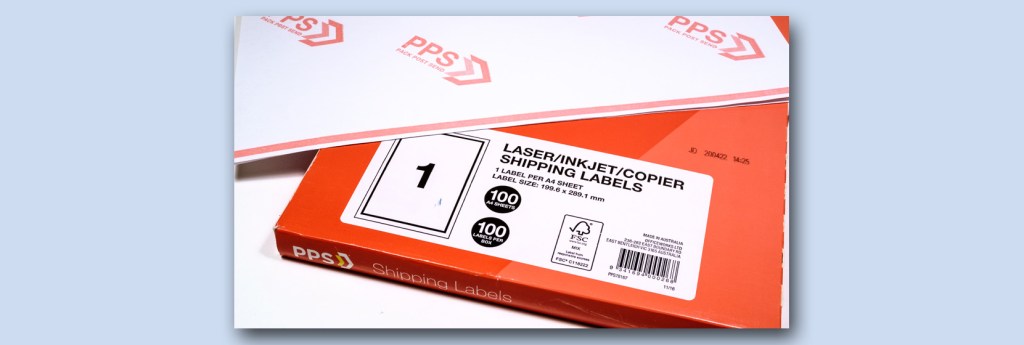
And like many of my favourites, it is cheap and plentiful. It also fills a long-desired need and is available from Officeworks. And I have a full packet of it…how much better could it get, eh?
The miracle product is A4 -sized sticky label paper. Avery and others make packets of it in all sizes for inkjet and laser printers and it is inexpensive when you get a 100-sheet box.
The need? Lettering for the wings and fuselages of 1:72 aircraft in sizes, colours, and fonts that cannot be found on a decal sheet. Logos and insignia that can be put on Junkers wings with their notorious corrugated surface, or upon hideously complex panelling. And lettering that cannot be printed…like white letters. My inkjet will not touch white as it has no ink for it.
Well, needs must. I can design and scale nearly any style of letters and numbers from the set of fonts that Apple and other makers supply. The read-out mechanism on Photoshop Elements will tell you precisely how wide or high a registration number will print out so you can match commercial decals easily. And the labels will accept plain paper printing on the Epson printer perfectly.
Okay, there are any number of sticky masking sheets made commercially that graphic artists use to create stencils. Some are durable and stretchy and some gauze-like but whether you get them from the hobby shop or the art supply shop, they are very expensive. Some of them are a great deal stickier on plastic than you bargain for. You can put them down and spray over them but getting them off again is another matter – some leave a murderous residue.
The experiment was to be done on a Junkers wing – corrugated sheeting. A nightmare to decorate as there is no way to get most decals to set down into the grooves, no matter what special solutions you pour on them. The only real solution is spray painting.
I printed the letters, cut them out with a fresh knife blade on a Tamiya mat, pressed the stencil into place on the wing and masked the edges with cheap Bunnings green tape. The spray mix was thinnish and used regular-drying thinner. Thin coats of paint until the lettering filled in. Then a 20 minute wait until the unmasking, et voila:
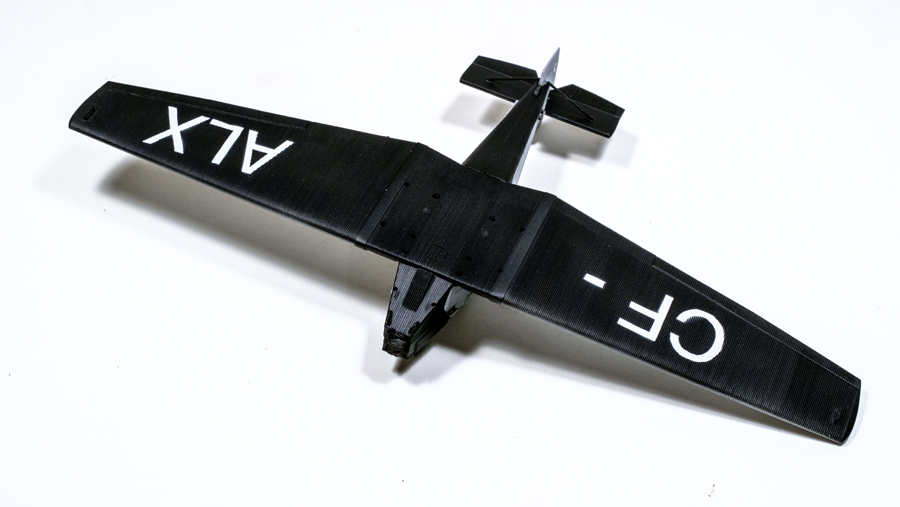
I could not be more delighted. I am determined to try painting insignia next using the same technique. Oh, for a miniature laser stencil cutter…

Leave a comment