
I know trouble when I see it. I know it even better when I wallow in it. That’s fun, but not as much fun as steering around it. As I have done with the Mitsubishi Ann.
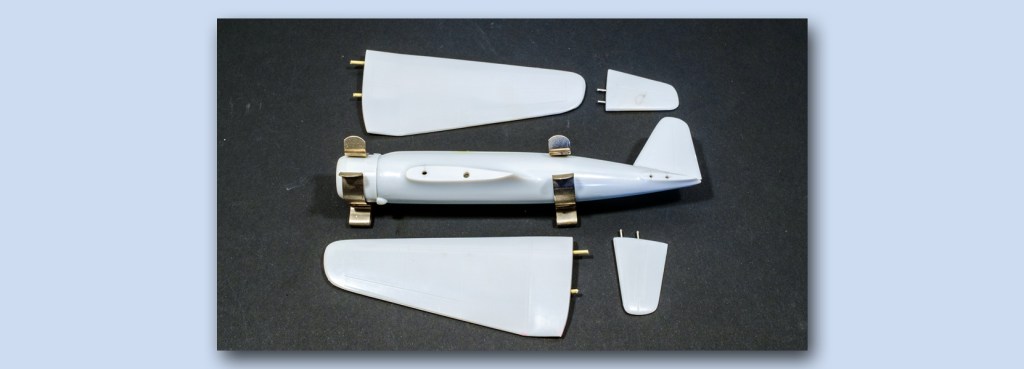
The sterling quality of the fuselage, wing, and tailplane castings were evident when I dry fitted them. But they were plain fittings – no mechanical purchase for any of the flying surfaces.
I’ve seen this before – easier and cheaper to make the kit that way – and quite frankly, if the kit is made that way but made with precision, it is going to be good – all you have to do is supply the engineering re-enforcement that economics had to avoid.
a. Mate the surfaces as well as scraping and sanding can do. Polish them if you wish. Get as good a place for cement to flow as you can.
b. Select two good points on the wing and/or tail plane that can accept a pin or a rod. Get thick sections with plenty of meat around them.
c. Chuck the wing or tail into a plastic-jawed vice, centre mark the attachment points, and then drill guide holes with a pin vice and micro-drills. Increase the hole size until it takes whatever pin or rod you need as a smug fit.
d. Cut and polish the pin or rod. Superglue it into the holes.
e. Present this to the wing or tail root and mark the matching face accordingly. Drill again, but this time you need not have such a tight fit. You may need a bit of wiggle room later.
f. File and fettle as needed, but you’ll find that you don’t need to do much to make it all ready for the cement. I turned the fuselage onto the starboard side and cemented the port wing on with Mr. Cement medium viscosity – and left it a good two hours to set. Then ditto for the starboard wing. Then the port and starboard horizontal stabilisers in a simple foam board jig.


Result? Square, symmetrical, strong, and ready for a small amount of filler to smooth the fillets. A good day’s work.

Leave a comment