
Faith and begorrah, and here’s to the Auld Sod. I mean the one who invented jigs to assemble airplanes.
I have reviewed all the commercial aids for assembly – the plastic, wood, and metal jigs that are touted on the modelling sites. Also the ones that appear in catalogs from places that will not ship to Australia. I have looked upon them with lust and suffered long nights of longing. Any worse and I would need an intervention.
But in the end I have concluded that the commercial jigs and building frames are largely a crock. They look like they would do something with great precision, but I suspect that the only thing they do is take is time and money. If anyone would care to donate one to me to prove me wrong, I am prepared to be argued with upon a practical basis.
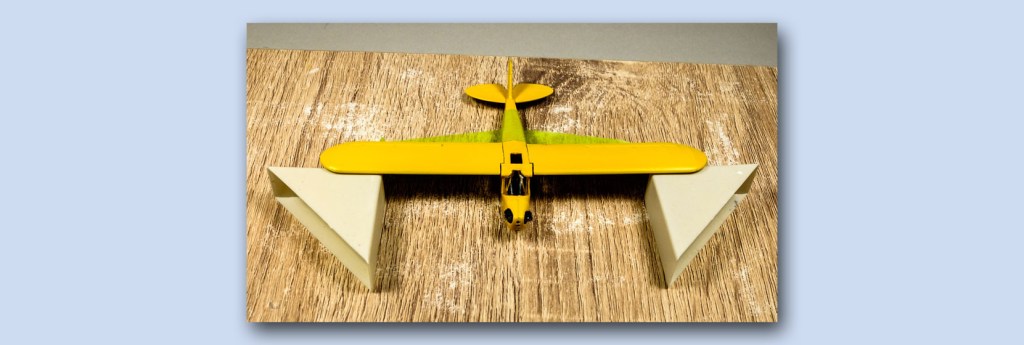
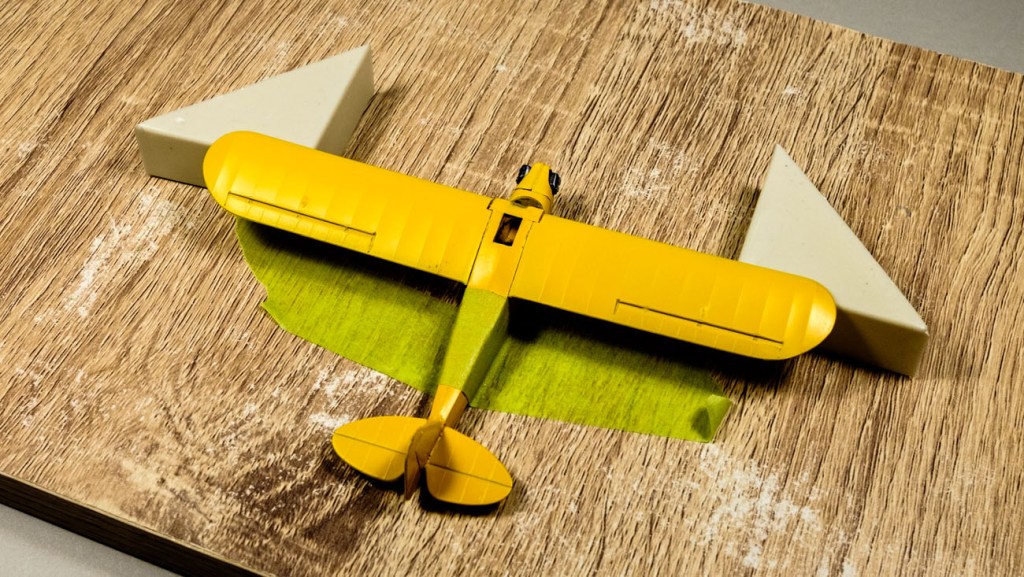
Failing this I shall continue to resort to the Sheedy Jig. The careful and frugal application of whatever is lying to hand to do whatever is needed. In this case the setup of the Piper J3, to get the wings to hold themselves up evenly on both sides.
The decision of which to put on first – wings or tailplanes – has up until the last few builds always been for the main planes first. Certainly a low-wing plane may have extensive fairing between the wings and fuselage – and this sets the wing angles rigidly. You always hope that the maker has gotten the geometry right and you are not going to have to embark upon a major campaign of change with plasticard and filler. Too much correction uses up your bad language supply early.
Even when you have two separate wings to deal with the first impulse is to get them onto their roots first-off and fettle the tailplanes to match.
However, recently I have been doing just the opposite – taking the vertical stabiliser and rudder as the prime line of the fuselage, I now assess whether the horizontal elements of the tail are going to fit well first of all. Some do – in the case of the one-piece tail on a WW1 aircraft you can get it perfect with shims if the maker has fudged the fit. Even two-piecers can be pinned and set in perfectly by means of a foam block cut to 90º. I’m not afraid to do each side separately to get them well-set. And not afraid to do a twin-tail separately before offering it to the fuselage. I bless under-tail bracing.
If the fuselage has no actual twist to it, you are then in a good position to set it flat on the building board and secure it as firmly as you can – rudder vertical. Some fuselages are a right pain – if there is nothing but an oval or round section all along you can be taping and wedging the whole length. Happily, the Piper has a flat bottom.
Then it’s into the foam block box. Thus has blocks cut in pairs from different sizes of Foam Core board. I also snaffle matching plastic re-enforcing blocks, basketball playing cards, sheets of plastic, or whatever can be wedged under the wings. You’d be surprised how precise your eyesight can be in determining alignment as you sight from aft forward. Your choice whether you use medium or thin cement, but don’t be afraid to coat the sockets as well as the tabs to get enough welding going on. And don’t be in a hurry to poke it later to see if it has set. Overnight, things set.
It may also be possible to set up a multi-level Sheedy Jig to cope with biplanes, but this is fuel for experimentation in the future.

Leave a comment