
With my heart in my mouth and my underwear screwed up tight…
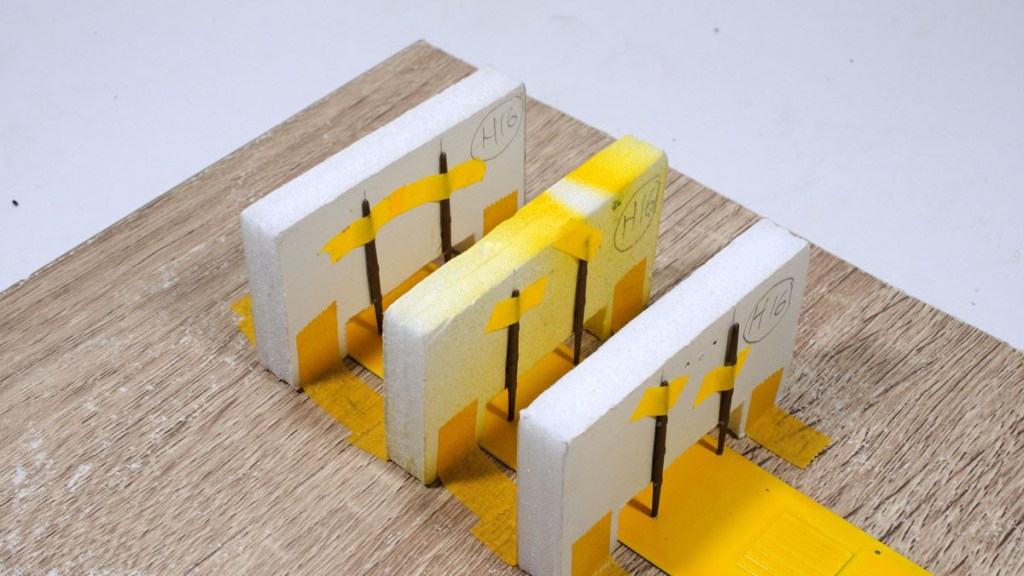
I set out to put 12 inter-plane struts on the lower wing of the Curtiss – all 12 upright and at the same angle. The way I did it was to use three old foam-board shapes I had made when doing an Airfix biplane. They straddle the lower wing as it is taped onto a flat building board and can then support the struts as they set.
To their credit, Roden have accurately marked the strut positions on the lower and upper wing and all one needs to do is slightly deepen them with a tiny drill to clean out any paint that might prevent cement adhesion. The lines drawn on the foam-board bridges let you set things upright and then you secure them with a little tape.
I do prepare the holes with a little thin cement, but always dip the ends of the spars in a thicker one for real stickiness.
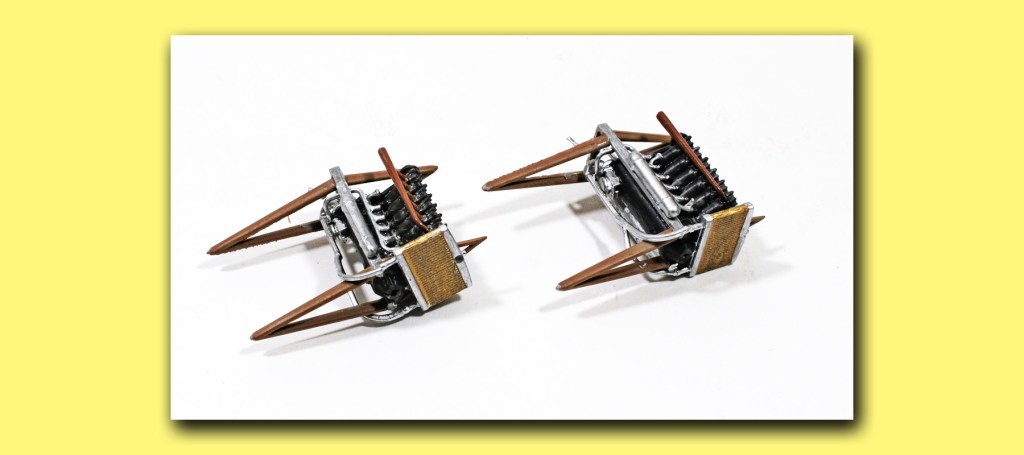
One side at a time – then go away for three hours until it is all set. Then the other side. The engine assemblies go on late at night and get to set until next morning.
The result is a lower wing with 14 stalks sticking upright with a firm grip – yet not so rigid that they cannot be moved a millimetre or so if need be to match the upper wing holes.
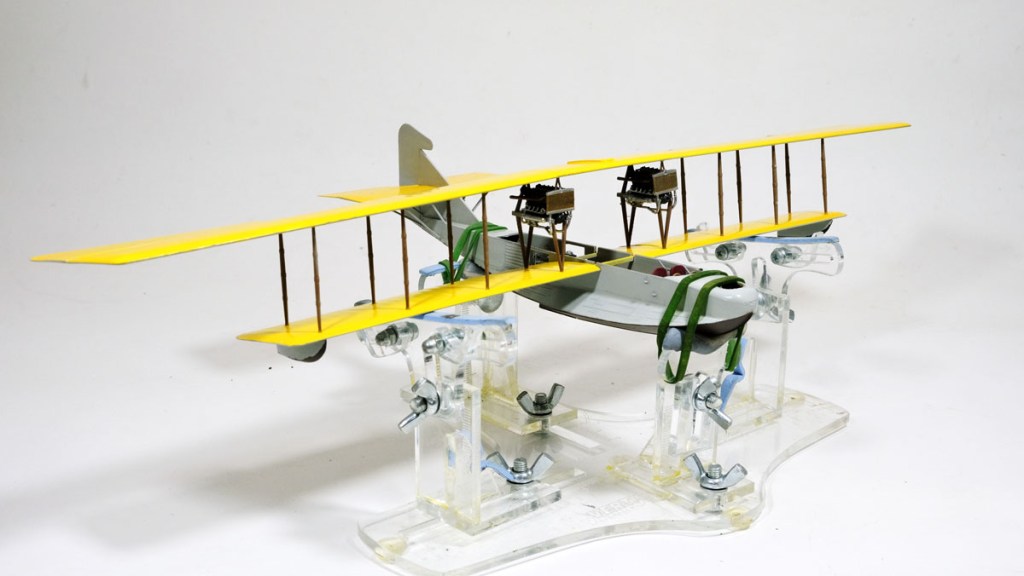
You tape down the upper wing, gently ease the assembly onto it, and start to attach the struts alternately left and right. I use medium cyanoacrylate and when I am sure the thing is straight I brush on a little Zip Kicker. The wing assembly stiffens up as I go and eventually it is plumb and done. Note that I never trust CA for everything – I secure the ends of the struts as well with a little PVA.
When it was all together and could be dropped into slots at the top of the hull, a loud whooshing sound was heard.
You try holding your breath for an hour…

Leave a comment