
To your doom.
I’ve written before about the Czech, Russian, Polish, Ukrainian, and Chinese instruction sheets that we get with our kits. I won’t repeat the sly digs at the Chinglish, Czechlish, or other dialects involved – suffice it to say that we should be grateful for the kit and not be such English language snobs.
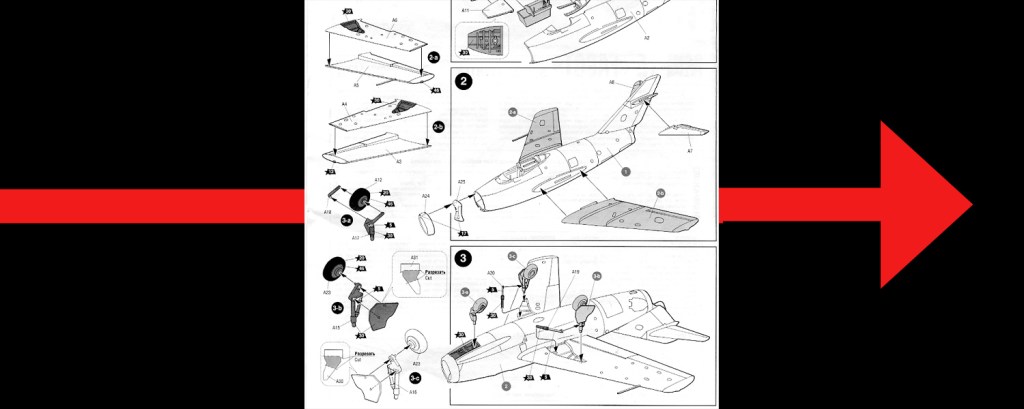
That the instruction sheet now generally has two call-outs associated with it shows the advance of the hobby over that of my youth. I am always pleased to see the parts diagram with letters, numbers, and greyed-out bits as it can save me from making serious floaters in the building. I also welcome spare parts for the inventory, particularly when they include lots of bombs, torpedoes, and rockets. You can never tell when you might need a spare bomb for your trainer airplane.
I am a little more circumspect about the colour call-out as I now realise that printed sheets may not be accurate guides for the real paint. Ah, but then again, neither may any other diagram, chart, or internet discussion. In some cases you need to go down to the air museum with a screwdriver and unbolt a piece of the fuselage and bring it home for colour matching. Try to be unobtrusive.
At best, the colour call-out with a key to a manufacturer’s range of paints ( and the best ones give two or three alternative makers ) can let you know where the artist thinks the paint went to. You still need to look at photos of the real things to be sure. The best bet is the sheet, plus manufacturer’s colour chart, pls enough internet pictures, plus a Profile book. Then wing it.
All this done, the great journey starts with the assembly steps. I’ll be frank – Airfix and Tamiya are the best – Mach 2 the worst. Everyone else in between shows you what goes where but often not how – they get things mixed up in sequence or imagine that you can insert a delicate part then avoid breaking it for three weeks while you juggle the rest of the model and two chain saws. I now try each advisory step beforehand – it is rather like the old childhood practice of dry-playing with a model for weeks before any real assembly was undertaken. Then it was to stretch out the play time between new models – now it is to make sure that the makers are not pushing me over a precipice whilst cackling with laughter.
At the end of each build, after I have photographed the model for this column, I carefully cut out the main box art and the colour call-out. These, along with the spare decals, go into storage…and lo, and behold…they sometimes come out of storage again to decal or fuel a new model. Along with the growing spares trays they are a real resource, though some decry them. I am more frugal – I know the power of old parts.
My body has a lot of them.

Leave a comment