
Category: subassembly
-
Consolidated Catalina – Part Two – Stand Down Canso
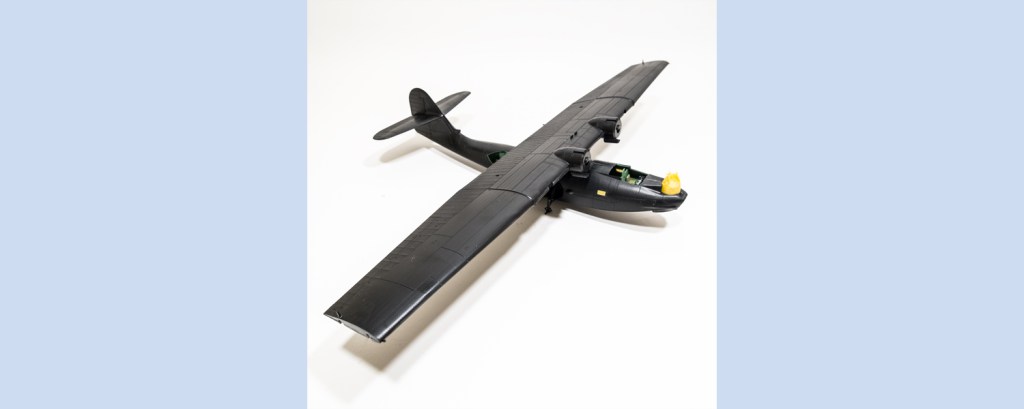
The Academy model of the Catalina PBY-5A proved to be a delightful thing in the box. But the thinking that wanted to convert it to a Catalina I in RCAF markings was as flawed as hell. The kit is moulded in black plastic – and any attempt to throw it over to RCAF Coastal Command…
-
Republic Thunderjet – Part Two – ” Warsaw, We Have A Problem…”
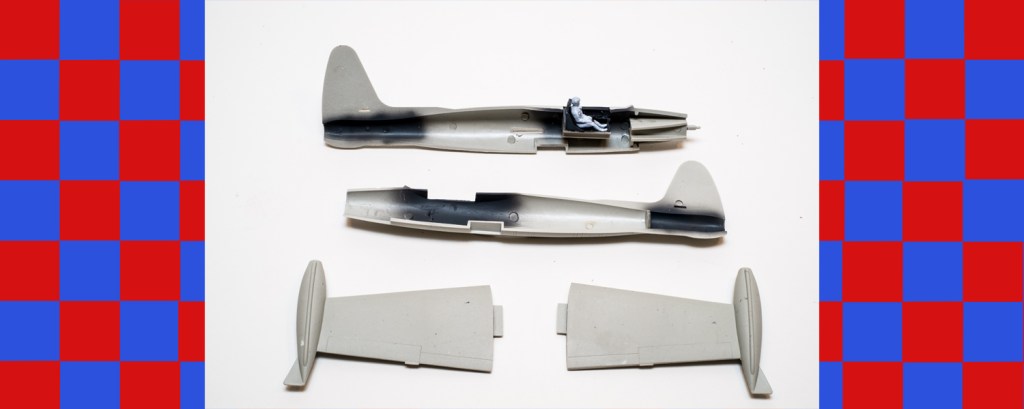
When I introduced this Mister Craft model last post you may have gotten the impression that I was making fun of it. Nothing of the sort. I am coming to the conclusion that there is no fun to be made with any part of it. The good news is the wing top and bottom halves…
-
Armstrong Whitworth Whitley Mk V – Part Three – Subassembly Day

A day at my model building club is a short one – I get there about 9:00 AM and leave at noon. But I can accomplish a lot in those hours…drink coffee, eat cake, make bad jokes, and cement the first parts of a kit together. The amount of cementation depends to some extent upon…
-
Burbank
I appear to have started an aircraft factory. This was not my intention when I began my retirement modelling – I was just looking for one or two kits to while away spare time. Nostalgia. A mere bagatelle. Well, the Mere Aircraft Company’s Bagatelle Mk III turns out to have been a hell of an…
-
Gluetoset

Waitin’ for the gluetoset. Is there a more agonising time? Waitin’ for the paintoset has been suggested, but at least while you are doing that you have something to look at. And you are trying to keep the rain/flies/dust/fingers off the new colour so you are occupied. But waiting for the gluetoset? Millenial boredom. Those…
-
Grumman Wildcat – Part Three – Nodecal

Nodecal – the pill that makes you a better modeller. One review of this Hobby Boss Wildcat kit bemoaned the fact that there were no decals for the wing or fuselage bands. The review also went on to complain about the proportions of the tail and the scribing in the wing surfaces.Now, I’m not a…
-
Grumman Wildcat – Part Two – Four-Part Harmony
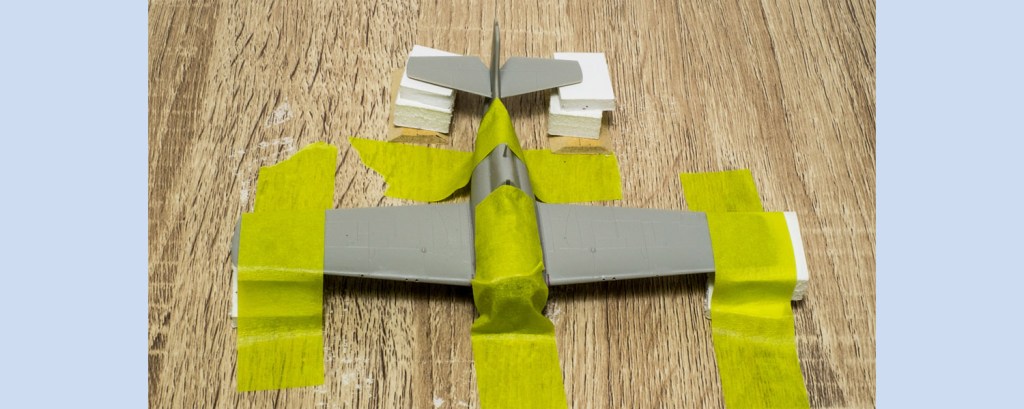
In each of the two pictures on this post there are four plastic parts. They’re glued up and setting overnight. The time taken to get to this point, including the washing of the parts, was about one hour. I’ve spent longer in the barbers. This would be a terrible thing for some modellers to contemplate.…
-
RCAF Lancaster – Part Five – Subassembly
I think one of the nicest things about the new Airfix kits is the way that they have decided upon the subassembly moulding. In the case of the Lancaster they’ve done something that I have not seen before…but would like to see again. The point of assembly for many aircraft builds that makes me nervous…
-
RCAF Lancaster – Part Four – Button Up

The interior detailing on the fuselage was finally done – here’s what it looks like with no additional parts or work: The map is a decal. Pretty neat for no photo-etch. The other thing I commend Airfix for is the strut and former construction that mean the wings are going to go on right. Of…
-
RCAF Avro Lancaster – Part Three – It All Starts With Bits

I try to be thrilled with all parts of the kit building I do – from the shopping and acquisition through to the plans, cutting and fitting, painting , and final assembly. But it must be said that there are times when the stages are very small and you don’t seem to progress. The initial…
